Pasteurization and Sterilization
Pasteurization vs Sterilization
Why is it important?
Mushroom cultivation is mostly a process of growing fungal tissue on enough food to support it producing mushrooms. In a completely sterile environment where the fungus doesn’t encounter pests or competitors, it can continue to colonize the substrate/food until it has eaten everything it can.
Completely sterile environments are non-existant in our natural world. Even in the cleanest of homes, a cubic inch of air can have hundrends or thousands of microscopic particles such as dust and spores. When cultivating we try to give our fungal tissue the best conditions possible to grow quickly by limiting contaminents that compete with the fungus for food, or even harm it. It is very difficult to remove contamination from fungal tissue so prevention is critical.
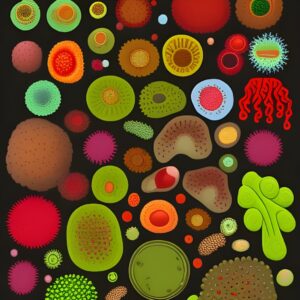
An Imaginary Look Under The Microscope

Imagine we’re looking at all of the different things that could be living on our substrate. Many of these things will thrive on the highly nutritious incredients we will feed our fungi. When working with our least nutritious substrates like wood chips, straw, or sawdust, we want to kill the most aggressive microorganisms while leaving others to help fill the vacuum.
Pasteurization

Pasteurization involves temporarily creating an environment that is toxic for many microorganisms but will leave others unaffected. Ideally these other microorganisms do not harm our cultivated fungus, don’t grow aggressively on the substrate competing for food, or might even be beneficial. When exposed to open air, new contaminents have a difficult time getting established because there are still other microbes populating the substrate.
Sterilization

Sterlization kills significantly more microbes leaving the substrate nearly 100% free from other microbes. The benefit is that there is an even smaller chance that any remaining microbes can gain a foothold and contaminating the substrate. The downside is that once sterilized, any new microbes introduced to the substrate will have less competition maintaining sterile conditions in very important.
Comparing Methods
Sterilization is most often accomplished by heating the substrate to 250F for 15-90 minutes depending on the amount and type of substrate. Liquid sterilizes faster than bags of wet sawdust. Since water boils at 212F, contents must be heated in a pressure cooker which allows the water to reach higher temperatures before turning to steam.
Substrates are pasteurized below boiling temp and can be done in a hot water bath, or using steam. A common pastuerization method involves heating the substrate to 160-180F for 1-2 hours.
Sterlization Times At Various Temp/Pressure

Agar
Traditional Technique
Instructions:
- Choose appropriate vessel for agar such as heat tolerant pitcher, flask, or liquor bottle
- Prepare agar per instructions in vessel, or prepare then add to vessel for sterilization
- Cover with foil or lid to prevent cantamination after sterlization
- Add 1-2in of distilled water to pressure cooker
- Cook at 15psi for 20-30 minutes
- Remove from heat and allow pressure to equalize before opening pressure cooker
- Cool in front of flow hood or in SAB until cooled to 120-140F
- Pour plates
No-Pour Tek
The “no-pour tek” is a technique to prepare agar plates or dishes without having to pour hot agar into petri dishes. The no-pour tek simplifies the process, reduces the risk of contamination, and is particularly useful for those who do not have access to a laboratory setting or a sterile environment.
The basic idea behind the no-pour tek is to pre-fill containers with agar medium, sterilize them, and then inoculate them with spores or mycelium. Here’s how you can perform the no-pour tek:
- Prepare the agar medium: Mix the agar with the appropriate nutrients and water according to the recipe you are using.
- Fill the containers: Choose containers with tight-fitting lids, such as small glass jars, plastic containers, or even disposable plastic cups. Pour the agar mixture into the containers, filling them about halfway or to a depth of about 1/4 inch (0.6 cm). Make sure to leave enough headspace for the agar to expand during sterilization.
- Seal the containers: Close the containers with their lids. If you’re using glass jars, you can use canning lids or foil to cover the jars. Some people also use breathable micropore tape to cover the openings, which allows gas exchange while keeping contaminants out.
- Sterilize the agar: Sterilize the containers and agar using a pressure cooker or an Instant Pot (as discussed in the previous answer). This step is crucial to kill any contaminants present in the containers or the agar mixture.
- Allow the agar to cool and solidify: After sterilization, carefully remove the containers from the pressure cooker or Instant Pot and let them cool down. The agar will solidify as it cools.
- Inoculate the containers: Once the agar is solid and the containers are at room temperature, you can inoculate them with mushroom spores or mycelium. Work in a clean environment and practice good aseptic techniques to minimize the risk of contamination. Transfer the spores or mycelium onto the surface of the agar using a sterile needle, syringe, or inoculation loop.
Liquid Culture
- Prepare the liquid culture: Mix the ingredients for your chosen liquid culture recipe in the jars. Common recipes include honey, light malt extract, or Karo syrup mixed with distilled or deionized water.
- Seal the jars: Attach the jar lids and ensure they have a self-healing injection port for inoculation, and a gas exchange filter (such as a synthetic filter disc or polyfill) to allow for air exchange during mycelium growth. Tighten the lids, but do not over-tighten, as this could prevent air exchange during the sterilization process.
- Place jars in the pressure cooker: Put a steamer basket, or false bottom at the bottom of the pressure cooker to elevate the jars slightly above the water level. Add water to the pressure cooker, ensuring it reaches about 1-1.5 inches (2.5-3.8 cm) in depth.
- Arrange jars in the pressure cooker: avoid stacking jars directly on top of each other. If you need to stack jars, use a secondary trivet or steamer basket to provide stability and promote even heat distribution.
- Secure the pressure cooker: Close and lock the pressure cooker lid according to the manufacturer’s instructions. Ensure the pressure release valve is set to the sealed position.
- Sterilize the jars: Heat the pressure cooker on high until it reaches 15 psi (121°C or 250°F). Once it reaches the desired pressure, reduce the heat to maintain the pressure and start timing the sterilization process. Sterilize the jars for 15-20 minutes at 15 psi. Try to minimize the amount of steam being released to the minimal required to maintain your desired pressure.
- Allow the pressure cooker to cool: After sterilization, turn off the heat and let the pressure cooker cool down. Wait for the pressure to drop naturally before opening the lid. This process may take 30-60 minutes, depending on the size and type of pressure cooker.
- Remove the jars: Once the pressure cooker has cooled and depressurized, carefully open the lid and use heat-resistant gloves or tongs to remove the jars. Place the jars on a heat-resistant surface and allow them to cool to room temperature.
- Inoculate the liquid culture: After the jars have cooled, use a sterilized syringe to inject mushroom spores or mycelium into the liquid culture through the self-sealing injection port.
Throughout this process, maintain a clean and sterile environment to minimize the risk of contamination.
Fruiting Substrates
Pasteurization
Pasteurized substrates can be handled in non-sterile condions so this method is best when inoculating in open air. There are many ways to pasteurize substrates for mushroom cultivation. Here are just a few options
- Heat to 180F for 1-2hrs – Hydrate fruiting medium to activate spores as activated spores are less resistant to heat. Cook hydrated substrate to 180F and maintain this temperature for 1hr. Remove from heat, cool, and inoculate. You can use a hot water bath or steam to maintain the appropriate temperature.
- Hydrated Lime – Submerge straw or wood chips in a solution of hydrated lime in order to raise the pH to a level that kills most contaminants. Recipes give a range of concentrations from 6-20g per gallon of water. Submerge straw in hydrated lime/water solution for 12-24 hours. Drain solution, rinse well, then drain again to optimal hydration before inoculating. Be sure to wear protective eyewear and gloves when handling hydrated lime as it is caustic and can burn eyes, skin, or airway if inhaled.
- Cold Water Fermentation – Submerge substrate in cold water for 5-7 days in a large container or barrel. Make sure it is fully submerged. Then drain, rinse, and drain again until substrate is at appropriate level of hydration, then inoculate.
- Boiling Water Incubation – Add substrate to heat-safe container. Add enough boiling water to hydrate substrate to appropriate level, or drain later if overhydrating. Wrap container in towels to maintain heat and allow to rest for 12-24 hours. Inoculate once substrate has cooled below 100F
- Dish Soap – While not as effective as other methods, dish soap can reduce the amount of contaminents on straw and help reduce the waxy layer. Mix 1-2 tablespoons dish soap per 10gal water. In a large container mix hot soapy water with straw and maintain temperature of 160-180F for 1-2 hours. Drain, rinse, then drain to appropriate hydration before inoculating.
Sterilization of Fruiting Substrates
Substrates supplemented with wheat bran or other nutritious ingredients are prone to contamination and should be sterilized rather than simply pasteurized. Sterilizing bulk substrates straightforward.
Standard Instructions:
- Prepare bulk substrate according to recipe
- Pack into heat-tolerant myco bags, jars, or other containers
- Pack bags into pressure cooker leaving gaps to allow steam to penetrate throughout
- Cook at 15psi for 90+ minutes depending on bag size, and density in pressure cooker
- Allow pressure to equalize before opening, and consider waiting for contents to cool before handling
