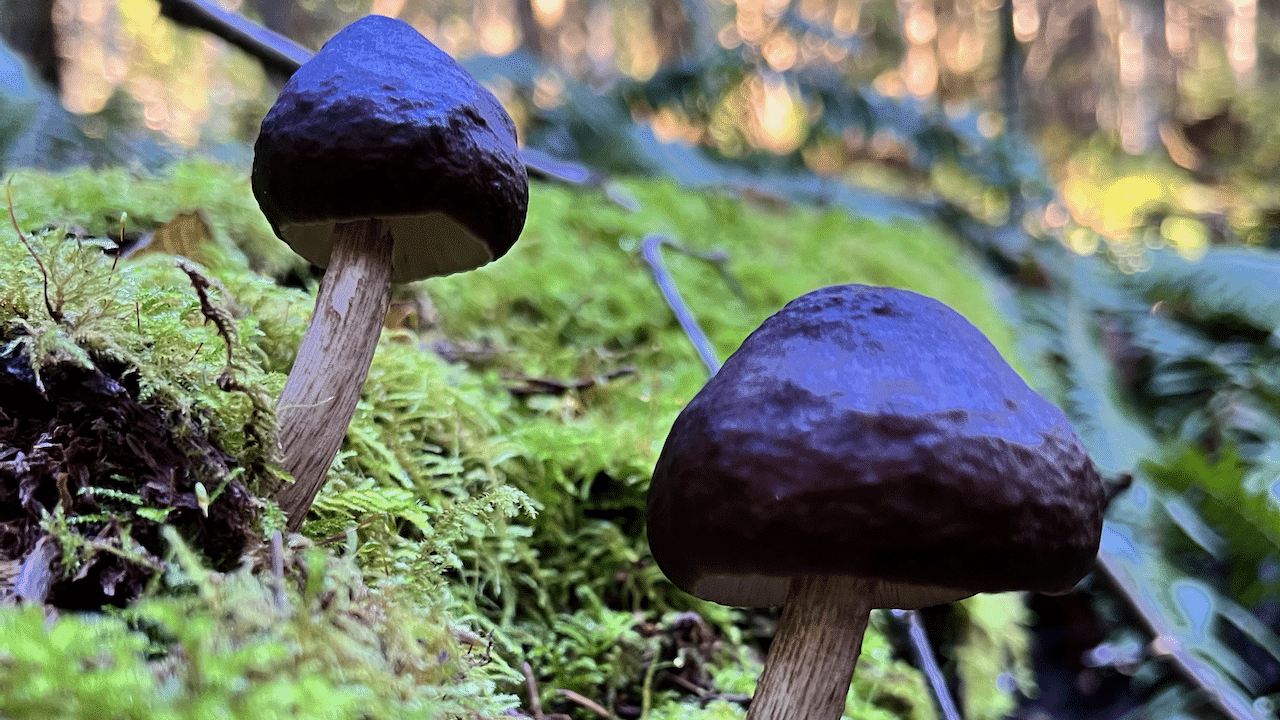
In January 2023 I stumbled upon a log of fresh Deer mushrooms in the Anacortes Community Forest in Northwest Washington. Deer mushrooms are broadly distributed around the world and are fairly common west of the Cascades.
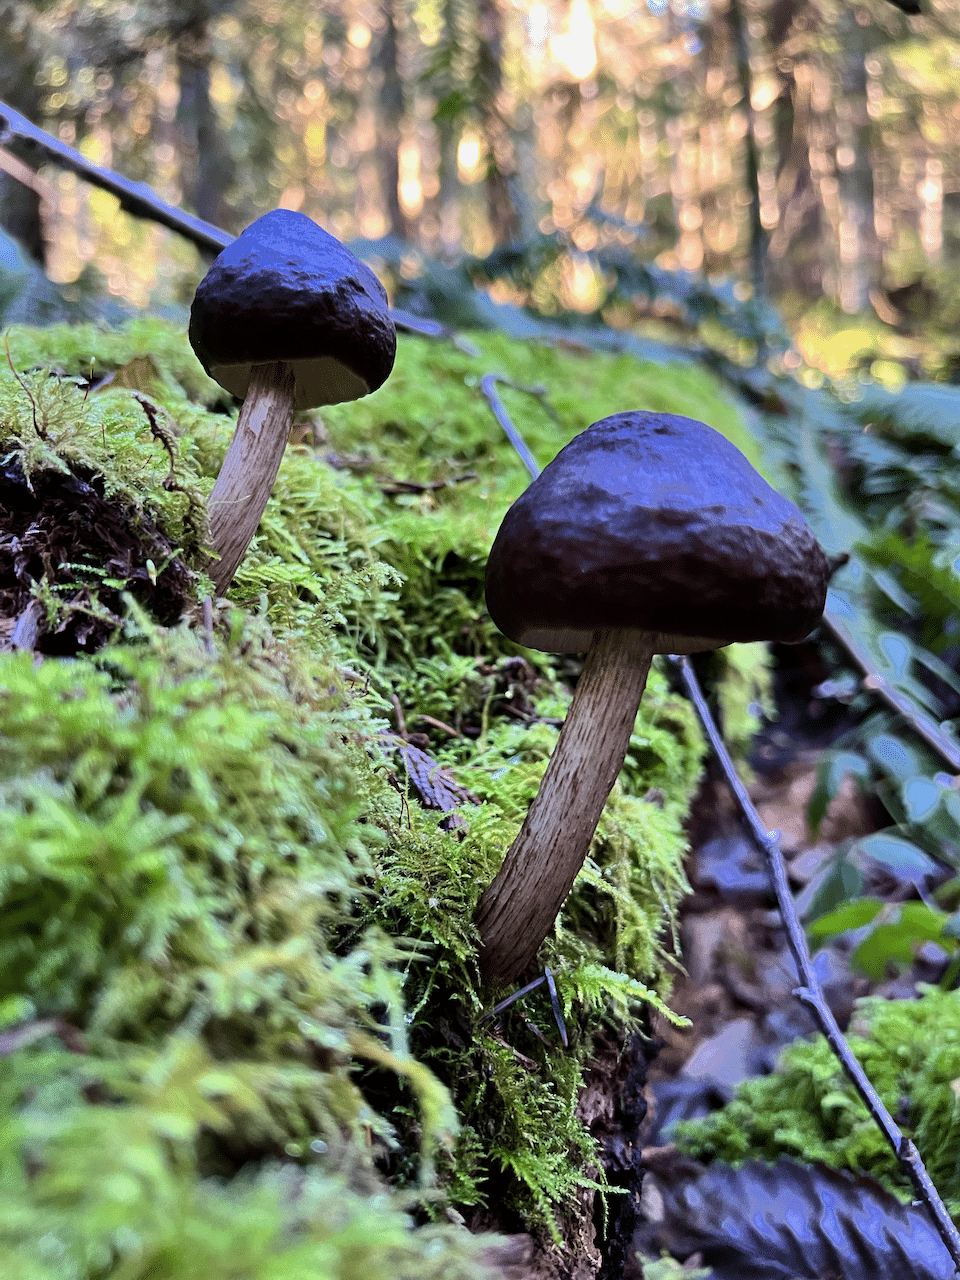
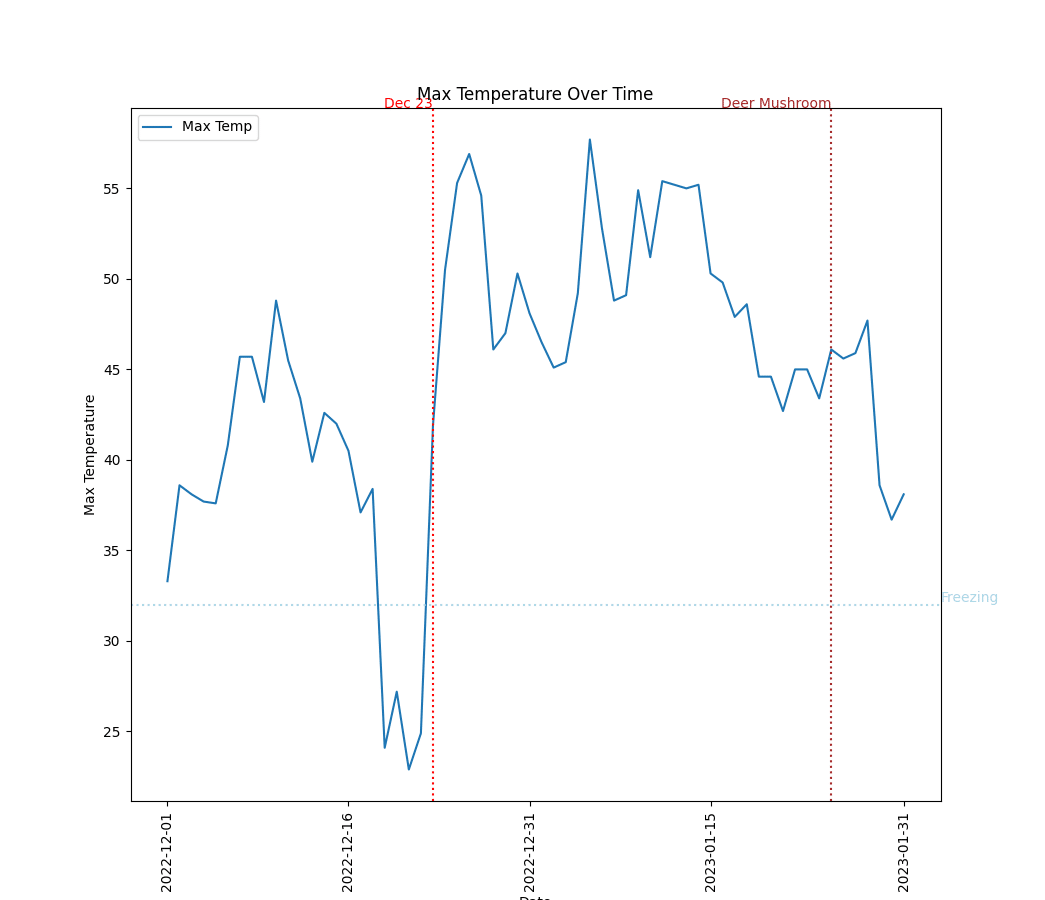
January can typically be a strange time to find such fresh mushrooms. After a brief freeze in mid December 2022, the region warmed up significantly on December 23rd and stayed relatively warm for most of January. This warming may have been adequate for prompting the deer mushroom to start growing.
Deer mushrooms, primarily found on dead wood, are decomposers. I decided it would be interesting to try growing deer mushrooms since they seem to grow in environments similar to other commonly cultivated wood-loving species, like oyster mushrooms. Nearly all mushrooms a person can cultivate are decomposers. This is because recreating a decomposing environment suitable for growing mushroom tissue filaments or the mycelium is relatively easy.
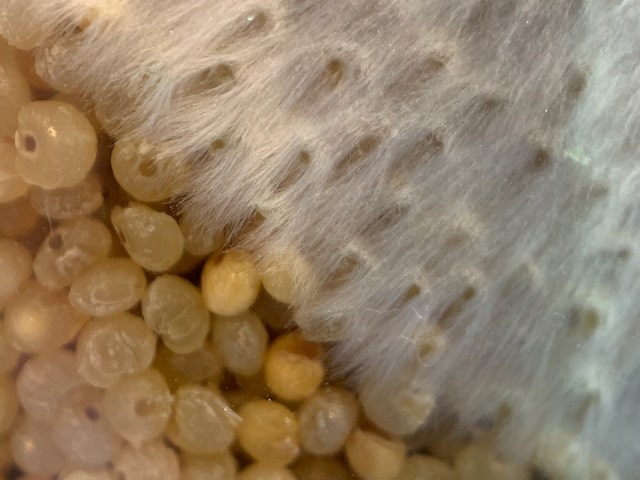
I brought one of the deer mushrooms I found that day home and started by making a spore print. This involved placing the mushroom cap, gills-down, on a piece of paper/foil/slide. I prefer foil as it allows easy identification of the spore color, regardless of whether they are light or dark. Deer mushrooms produce light pink or salmon spores.
Here’s an example of a spore print from a different mushroom
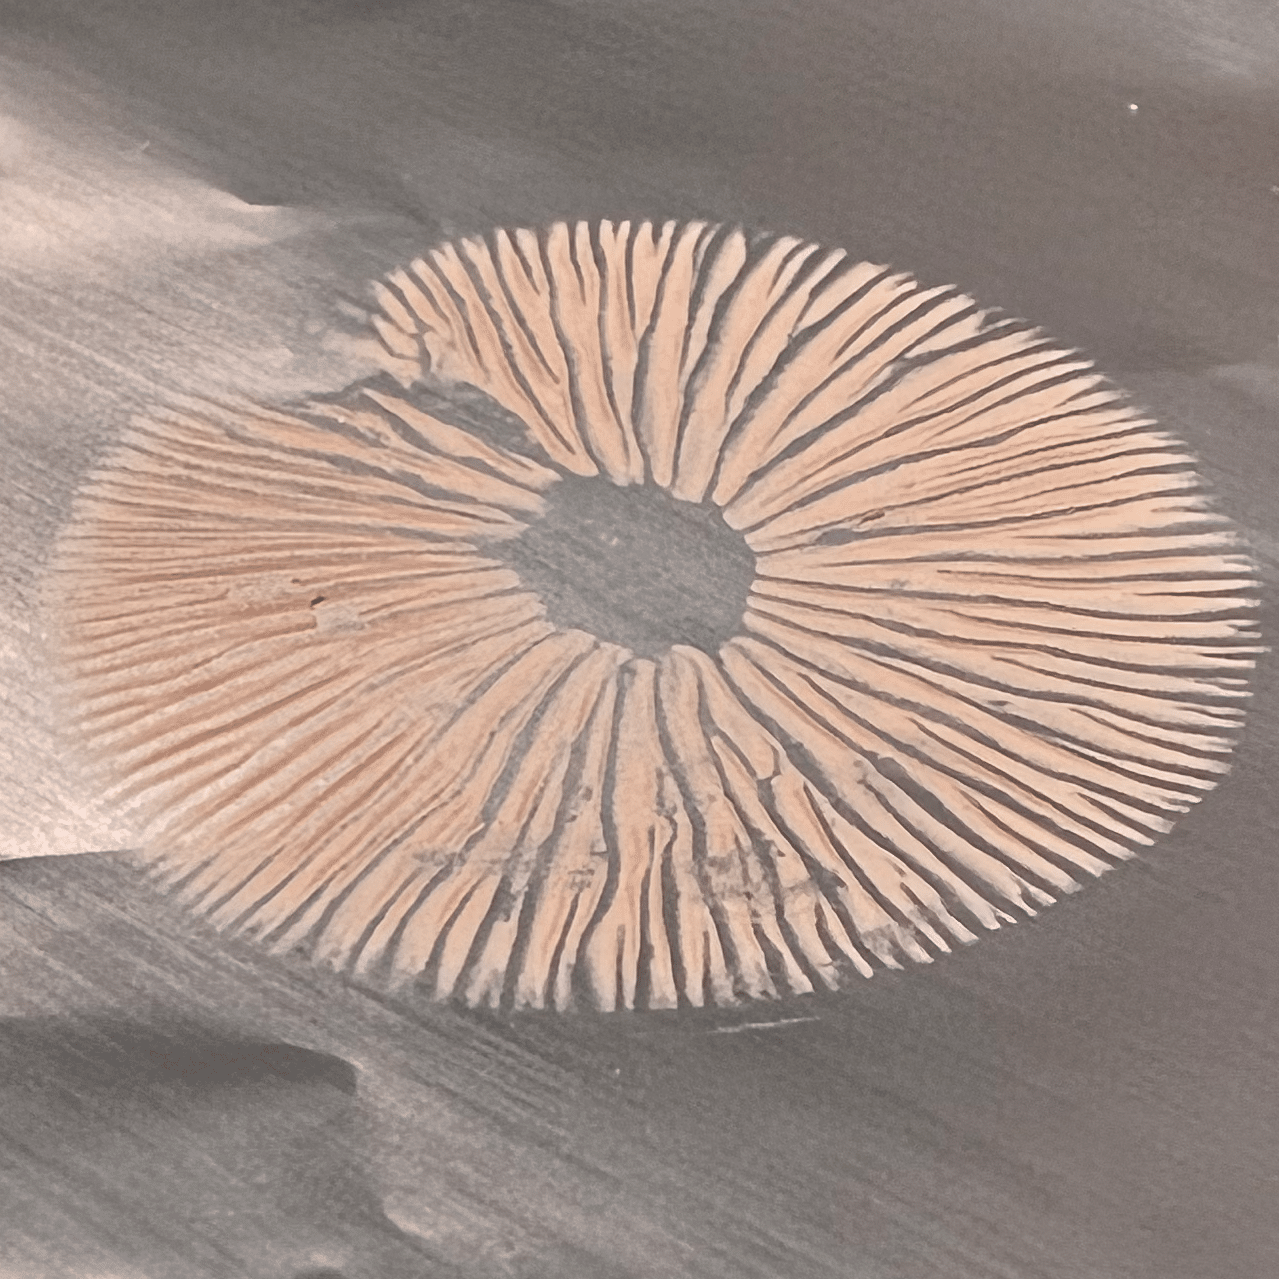
A spore print like this contains millions of spores. In nature, these spores would either fall back onto the log where the mushroom was growing or be carried away by the wind. When these spores land on a suitable substrate that provides food and moisture, they germinate, forming new mycelia.

When cultivating mushrooms at home, people often prefer working with a single isolated mushroom culture rather than directly from spores. There are exceptions, such as when growing psilocybe mushrooms, where many people prefer using syringes filled with spores suspended in water. However, when growing popular edible species, working with an isolated strain or culture has the advantage of allowing me to confirm that the culture is free from mold or bacteria contamination. If there is contamination, which is impossible to tell from the spore print alone, the mushroom culture will have to compete with other organisms for food or spend energy on protecting itself from being attacked by the contaminants.
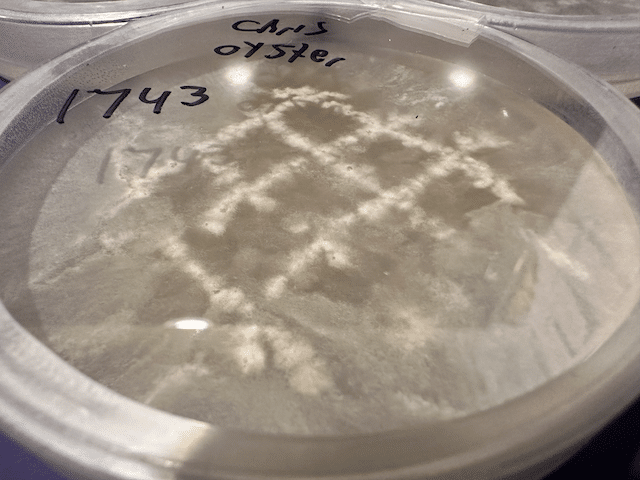
To start growing mycelia from a spore print, I use an inoculation loop. This tool is essentially a long, twisted wire with a small loop at the tip, which I can drag across the spore print to pick up thousands or millions of spores. Then, I drag the wire across a petri dish of agar, which has a firm gelatin-like consistency. Now, these spores, along with any other mold or bacteria present, will begin to germinate on the petri dish. Here are some examples of spore streaks I made using oyster mushrooms.
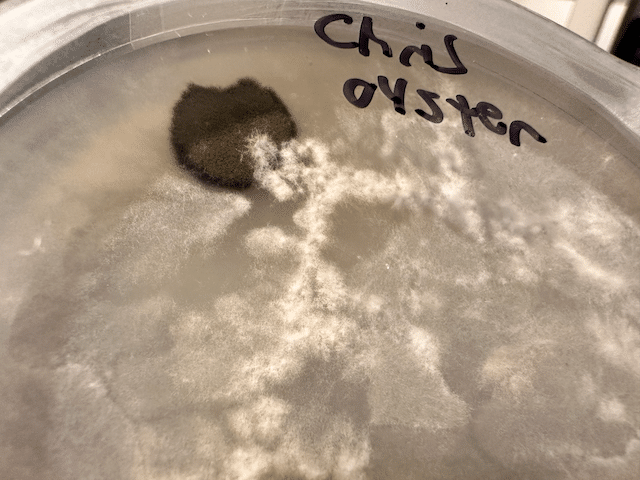
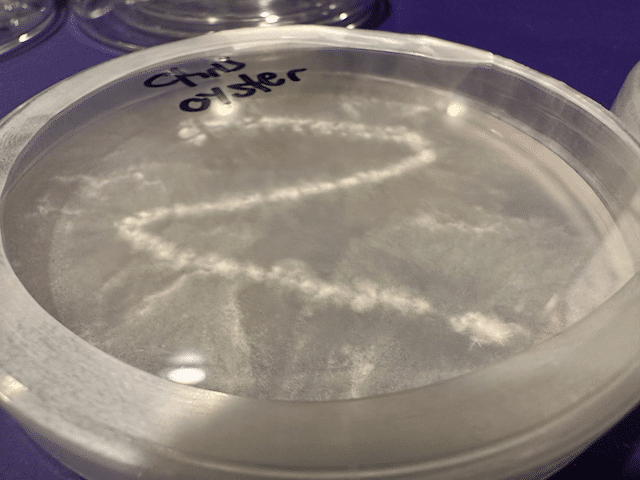
The objectives of spore streaks include:
- Initiating spore germination
- Creating less dense colonies for easy isolation
- Detecting and isolating the mycelium from any contamination
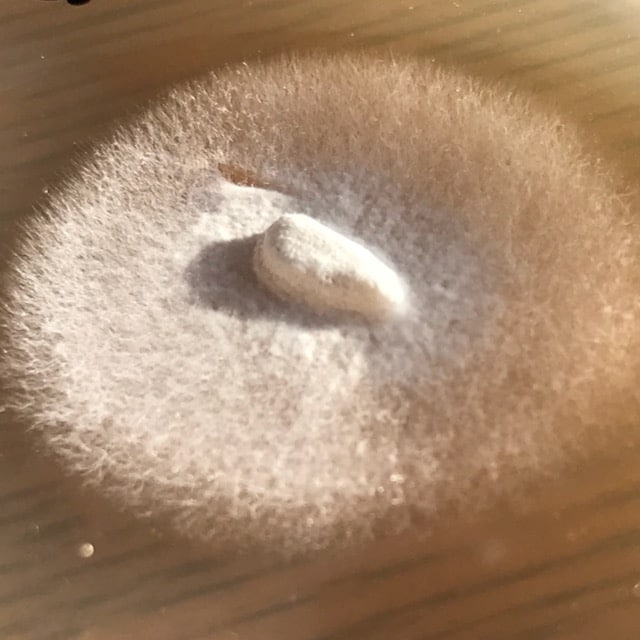
Next, I select a healthy-looking section of mycelium from an area that appears to be a uniform colony. The mycelia on these plates now entirely cover the surface, so I will pick a section and let it grow on a new plate.
Once I have what seems to be a single isolated strain growing, I use it to create a liquid culture. This is essentially mycelium growing in sterilized sugar water.
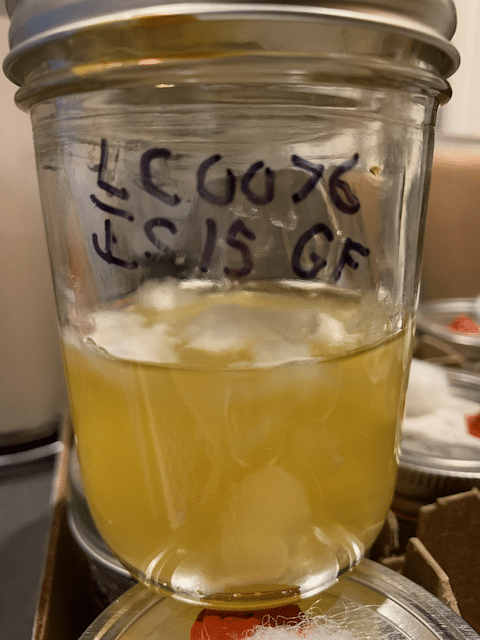
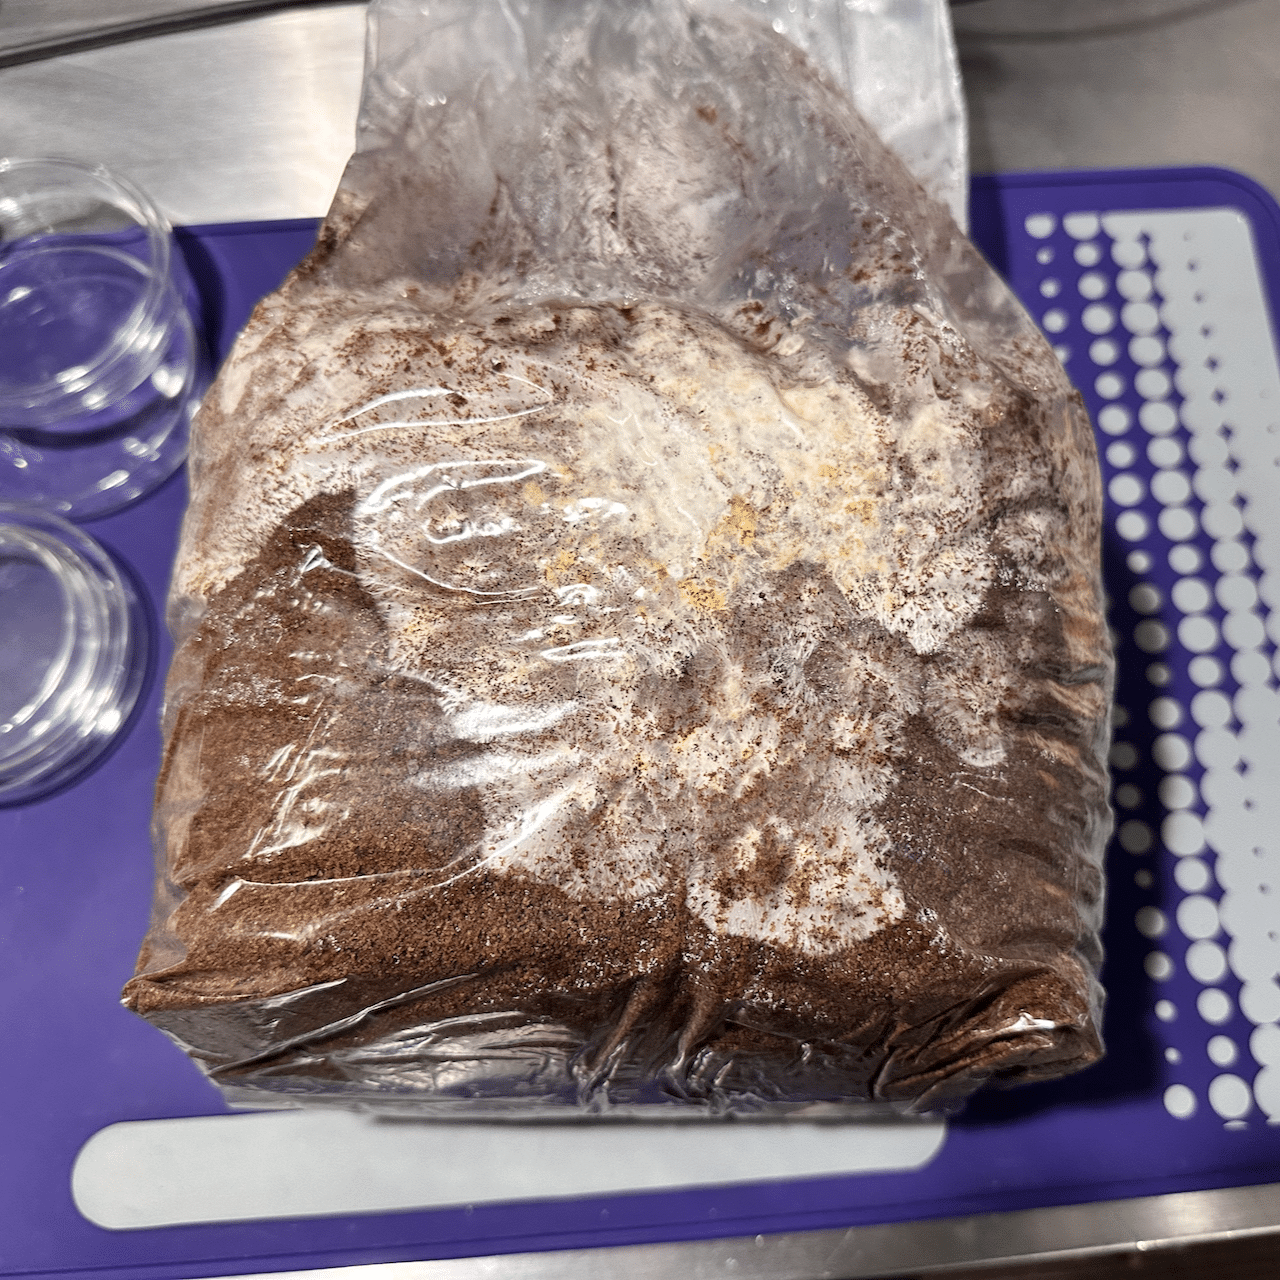
After 1-2 weeks, once the mycelium has grown in the sugar water, I use a syringe to extract a sample of the liquid culture and spray it onto sterilized grain, which acts as a substrate or food for the mycelium. I had left a jar of sterilized grain in my fridge for 5 months over the summer.
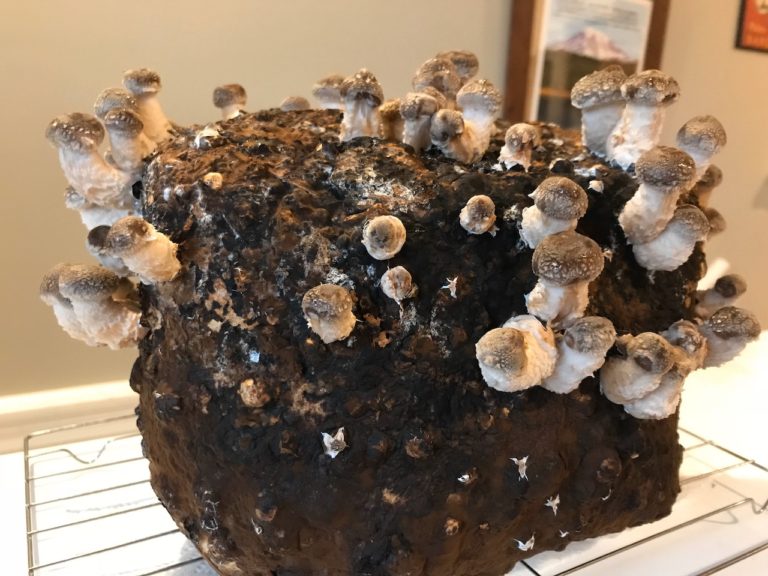
In October, I transferred the grain spawn from the fridge into three bags of sterilized sawdust, creating what you might recognize as a grow-at-home mushroom block. The sterilized sawdust mimics the environment where a decomposing mushroom would grow in the wild, but without the potential contaminants or competing organisms that a wild mushroom would face.
Over the following weeks, the mycelium grew throughout the sawdust, forming a dense, white block. While commonly cultivated species like oyster and lion’s mane fruit readily and are not overly sensitive to environmental conditions, other species require specific conditions to fruit. Discovering these unique conditions can require some experimentation.
I conducted a simple experiment to learn more about the deer mushroom I’m cultivating. I placed one of my bags outside daily (the recess bag) while keeping another inside. After about a week, I noticed a clear difference between the two bags.
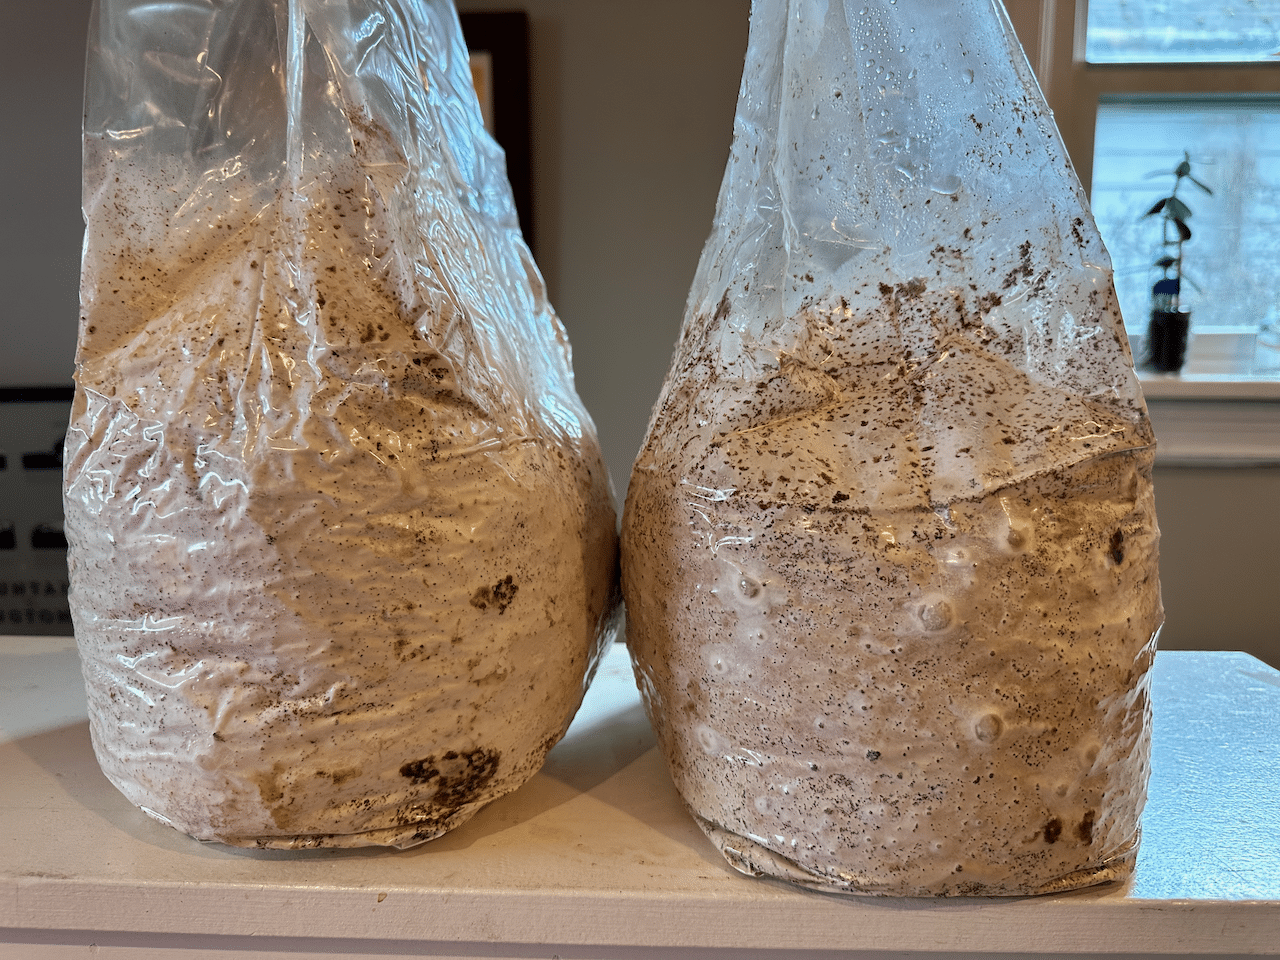
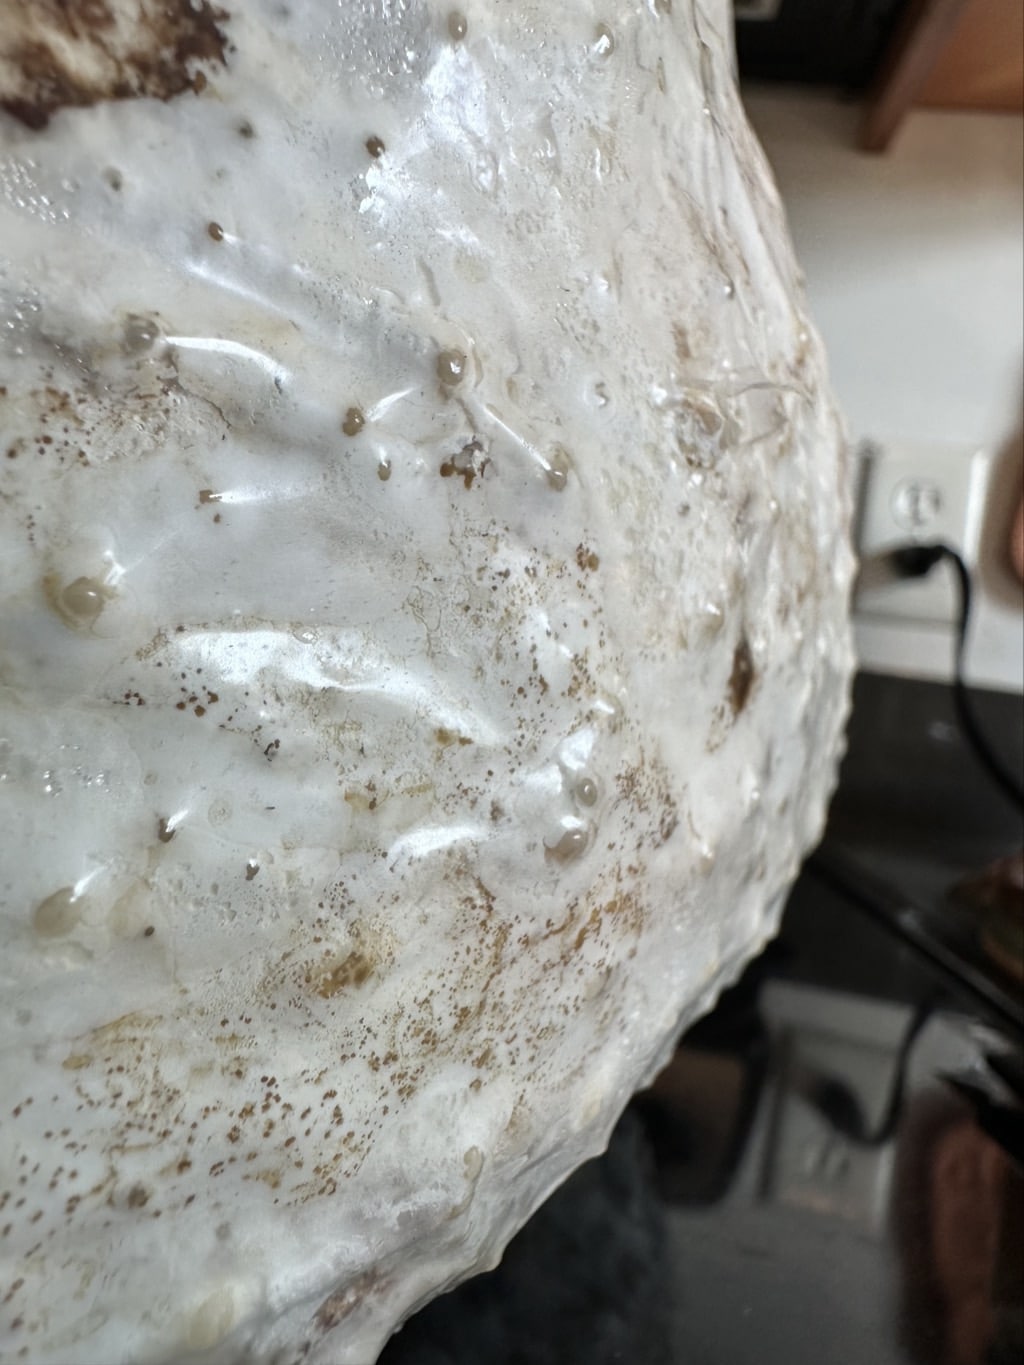
The bag that was placed outside (on the right side above) began to develop thick blisters, which I believe are large pins or the first stage of mushroom growth. The indoor bag showed no such blistering. Ideally, the pins would form on the top surface rather than the side with plastic, as the mushroom cannot force itself through the plastic. I decided to cut small holes around four of the largest ‘pins’ to see if this would allow the mushrooms to grow fully.

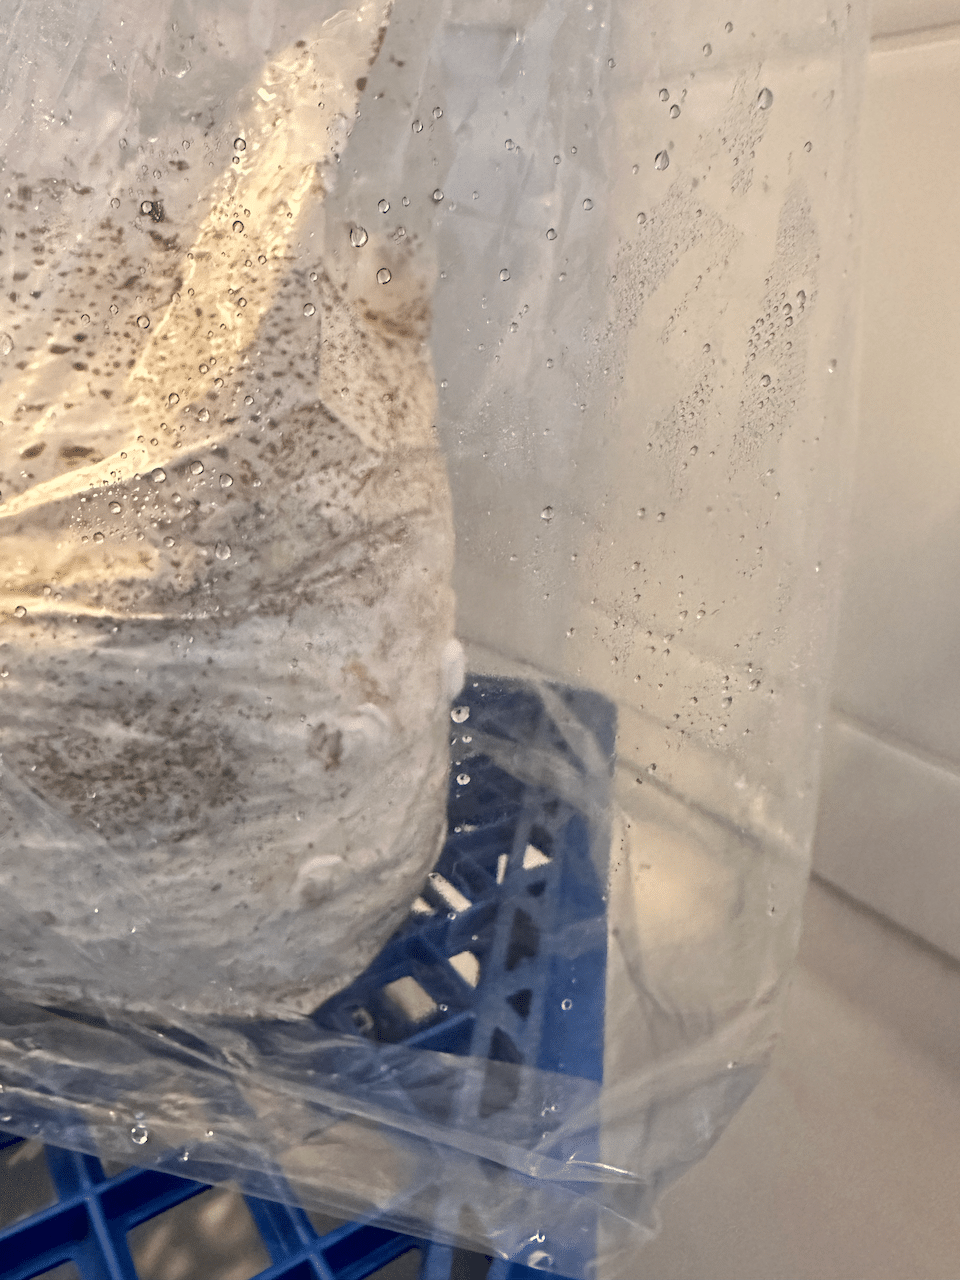
From behind the plastic, the pins appeared smooth, like the cap of a mushroom. Now exposed to the outside, the pins are growing more mycelium-like, so I’m unsure what to expect next. I’m keeping both bags indoors now and monitoring their progress. I’ve covered the bag that was placed outside with another plastic bag, which I spray with water once or twice a day. This simple humidity tent helps maintain high humidity levels around the mushrooms, preventing them from drying out. Once I have more bags ready to fruit, I plan to improve this setup with a fogger and fans for fresh air and humidity.
I plan to leave the indoor-only bag on a counter in my house without making any changes for another week or two unless I notice pinning. I’ll continue to update this post over time. If you have any suggestions or questions about cultivating deer mushrooms, feel free to reach out. I’m more than happy to share this culture with anyone else interested in experimenting.
Updates
Jan 19 – The inside/outside bag has stalled. After cutting small holes in the plastic around some of the tiny mushroom pins, I saw a small amount of new mycelial growth and nothing since. I setup my fruiting chamber so I can move this one into more ideal fruiting conditions. The indoor-only bag is not showing any pinning yet. I plan to wait for another week to see how inside-outside responds to the fruiting chamber, then consider cutting a hole in indoor-only to promote pinning.
Mar 19 – over the following 2 months little changed. Both indoor and ‘outdoor recess’ bags stayed in my fruiting chamber which remained around 65F. The dime-sized blistered didn’t get any larger and nothing new appeared.
Yesterday my friend Carl asked about updates so I had another look. Both bags had dozens of tiny pins pushing against the plastic resulting in 2mm tall, plastic-wrapped spines
I cut a small opening for 1-2 of these pins in each of the bags, then put them back in the high-humidity fruiting chamber. Fingers crossed
Final Update: I couldn’t get it to do anything more and eventually mold started to form around the opening.
Get the data serious foragers use to find more mushrooms
Free members get soil temps, precipitation, and ecoregion data. Pro unlocks the layers that help you narrow down exactly where to look.
- Historical burn perimeters — find morel habitat fast
- Timber harvest boundaries across OR & WA
- Detailed foraging area summaries with conditions
- Offline maps in the Forayz iOS app